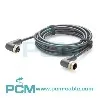
The steps to connect the PROFINET connector are as follows:
Prepare tools and materials
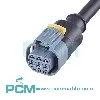
- PROFINET connector
- PROFINET cable
- Wire stripping tool
- Screwdriver or other necessary tools
Stripping cable
- Use the wire stripping tool to carefully strip the outer sheath of the PROFINET cable to expose the inner twisted pair.
- Usually, the PROFINET cable has 4 wires (2 twisted pairs), and the insulation layer of each wire needs to be stripped according to the requirements of the connector to ensure that there are enough exposed wires for connection.
Connecting wires
- Insert each wire of the cable into the corresponding connection terminal according to the marking on the connector.
- The typical wiring colors and corresponding wiring terminals of PROFINET are as follows:
Brown and white: one pair
Blue and orange: two pairs
- Make sure each wire is firmly connected and there is no possibility of looseness or short circuit.
Fix the connector
- Recover the housing part of the connector and fix it to ensure the protection level of the connector.
- Use a screwdriver or other tool to firmly secure the connector to ensure that the connection between the cable and the connector is stable and not easy to loosen.
Test the connection
- Plug the connected PROFINET cable into the corresponding PROFINET device.
- Power on and test the network connection to ensure that the PROFINET device can communicate correctly and there are no connection problems.
With the above steps, you can successfully connect the PROFINET connector and ensure the normal operation of the device in the industrial network.