If you’ve ever huddled over a mixing board at 2 a.m., tweaked a preamp gain until your ears were ringing, and still heard that faint, fuzzy distortion creeping into your favorite track, you might’ve blamed your gear, your room acoustics, or even your own tired ears. But what if the culprit was something as unassuming as the cable stretching between your turntable, microphone, or power amp? As an audio cables supplier who’s spent years troubleshooting issues for musicians, podcasters, and live sound engineers, I can tell you cable capacitance is one of the most misunderstood—and often most frustrating—factors in audio quality. It’s not just a trivial technical detail; it’s a silent villain that can rob your recordings of clarity, muddy your low end, and turn crisp highs into harsh noise. Let’s break down what cable capacitance actually is, how it wreaks havoc on your sound, and what you can do to mitigate its effects without cutting corners on performance.
First, let’s get the basics straight, no jargon overload. Audio cables, regardless of their type, are made of two conductive elements (usually copper) separated by an insulating material (plastic, rubber, Teflon, even air). Think of two parallel metal wires with a spacer between them— that’s a capacitor, a component that stores electrical charge. Every foot of audio cable has some capacitance, measured in picofarads per foot (pF/ft), because of this structure. The longer the cable, the more capacitance you get; the thinner the conductors or the looser the insulation, the higher that number climbs. That’s a key point many people miss: a 20-foot cable isn’t just a longer version of a 5-foot cable—it has four times the capacitance, because the parallel conductive area doubles.
Now, how does that translate to sound? Audio signals are alternating current (AC), oscillating thousands of times per second to carry everything from a deep sub-bass note (20 Hz) to a delicate cymbal crash (20,000 Hz). Capacitance resists changes in voltage in an AC circuit, right? That’s called capacitive reactance, and its formula is Xc = 1/(2πfC), where f is frequency and C is capacitance. What that means in plain terms is: higher capacitance = more resistance to high frequencies. So as your signal travels down a high-capacitance cable, the highs get attenuated—softened, rolled off, or even lost entirely—while mids and lows stick around like an uninvited guest.
I’ve seen this play out time and time again with podcasters testing their setup at home. They’ll grab a cheap 25-foot XLR cable for their USB mic adapter, record a clear voice at home, then plug it into a sound desk at a live event and wonder why their voice sounds muffled, like they’re talking through a towel. That’s not the mic or the desk—that’s the 25 feet of cheap, high-capacitance XLR cable rolling off the 3 kHz to 8 kHz range, which is where vocal clarity lives. Or take a musician using a long instrument cable for their electric guitar. A Stratocaster’s single-coil pickups put out a small signal, and pairing that with a 20-foot cable that has 50 pF/ft of capacitance adds up to 1,000 pF total. That capacitance forms a low-pass filter with the guitar’s pickup inductance, rolling off all the crisp, bright harmonics that make a Strat sound like a Strat. Suddenly, it sounds like a beat-up Les Paul with no sustain—even though the guitar itself is fine.
But capacitance doesn’t only mess with highs. It can cause another subtle, annoying issue called “signal degradation” that’s harder to pin down. In longer cable runs, high capacitance combined with the cable’s resistance can create a time delay, where different parts of the signal arrive at the destination at slightly different times. For music, that can make a mix feel “phasey” or unfocused, like all the instruments are sitting just slightly out of sync. For studio recordings, that’s a nightmare—you can’t edit that kind of phase distortion out without introducing new artifacts. I had a client last year, a freelance producer in Brooklyn, who was recording a folk artist with a banjo and a vocal mic. He was using a 30-foot DB25 To RJ45 TASCAM DIGITAL Adapter Cable to run his direct box signal from the banjo to his interface, and for months he couldn’t figure out why every banjo track had a faint, hollow ring under the notes. Once he swapped to a shorter, lower-capacitance adapter, the hollow ring vanished—turns out the long cable’s capacitance was creating a standing wave in the 1 kHz range that exaggerated that unwanted resonance.
Before you start panicking and replacing every cable in your rack right now, let’s be clear: not all capacitance is bad, and not all cables are created equal. The trick is matching your cable’s capacitance to the load it’s driving. This is where impedance matching comes in, a concept that’s central to avoiding the worst effects of capacitance. Every audio device—mic preamp, guitar amp, interface input—has an input impedance, measured in ohms. For example, most mic preamps have an input impedance of 1,500 ohms or higher; electric guitar pickups are around 10,000 ohms. The ideal cable capacitance for a given load is inversely proportional to the input impedance: lower input impedance means you can get away with a bit more capacitance, while higher input impedance (like a guitar pickup) means you need lower capacitance, or the rolloff will be noticeable.
Take instrument cables, for example. A guitar’s high-impedance pickup pair very poorly with high-capacitance cables, so good instrument cables are usually made with smaller wire, tighter insulation, and materials like Teflon that reduce capacitance down to 20-30 pF/ft. If you use a 25-foot instrument cable with that capacitance, total capacitance is 500-750 pF, which won’t roll off the highs enough to be noticeable to most listeners. But if you tried using that same cable for a microphone, which has an input impedance of 1,500 ohms, that 750 pF would create a rolloff at around 20 kHz—right at the upper limit of human hearing, but enough to make a vocal sound just a touch less present. That’s why we stock a range of cables tailored to specific uses, not just generic ones. For live sound mixing, long runs (over 10 feet) of XLR cables for mics should be low-capacitance, usually around 30-40 pF/ft, to preserve vocal and instrument clarity. For power cables, like our PowerCON True1 Splitter Cable used for power distribution in rigs, capacitance isn’t even a factor—power carries a different signal entirely, so that cable is designed for durability and current capacity, not audio frequency performance.
I want to touch on a common myth here: the idea that “thicker cable is better.” That’s only partially true. Thicker copper has lower resistance, which helps with signal loss over long runs, but it doesn’t directly impact capacitance. In fact, thicker conductors placed closer together (to save space) can actually increase capacitance, because capacitance depends on the surface area of the conductors and how close they are. That’s why some thick, cheap audio cables have surprisingly high capacitance—because the manufacturers cram more copper into a smaller space, bringing the two conductors closer together. So when you’re shopping for cables, don’t just look at gauge. Look for capacitance ratings, especially for signal cables.
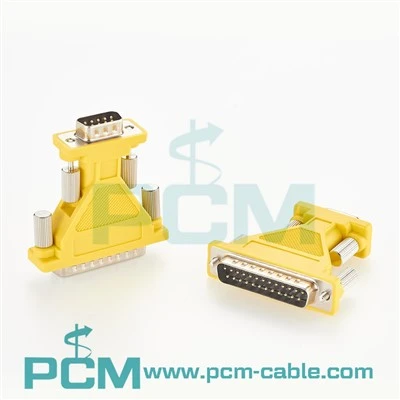
Another area where capacitance comes into play is with digital audio cables. Digital signals are ones and zeros, right? So why would capacitance matter here? Because digital signals rely on maintaining a sharp voltage swing to be interpreted correctly. If a digital signal travels through a high-capacitance cable over a long distance, the signal can get “soft,” meaning the voltage swing isn’t enough to tell the difference between a 0 and a 1. That can cause dropouts, glitches, or even full signal loss—something no podcaster or live engineer wants. That’s why digital adapters like our RJ45 Male To MINI 1/8 Female Cable and our DB25 To RJ45 TASCAM DIGITAL Adapter Cable are designed with low-capacitance, shielded wiring specifically for digital audio signals, to keep those sharp voltage swings intact even over longer runs.
Now, let’s talk about how to actually deal with capacitance, because it’s not something you have to eliminate entirely—just manage. First, keep cable runs as short as possible. This is the simplest fix: cutting a 20-foot cable down to 10 feet cuts your capacitance in half, immediately reducing the high-frequency rolloff. I always tell my clients to measure the exact distance they need for their cables, then add 1-2 feet for slack, no more. That one change alone has fixed 80% of the capacitance-related quality issues I’ve seen over the years.
Second, choose cables rated for low capacitance for high-impedance loads. For guitars, mics, and digital signals, look for cables that are specifically marketed as low-capacitance, with ratings under 40 pF/ft. Avoid generic bulk cables from big box stores that don’t list capacitance at all—those are usually the ones with 50+ pF/ft, which is where the problems start. Our XLR Female To 1/4 Inch TRS Cable, for example, is designed for balanced and unbalanced signal runs, with low-capacitance Teflon insulation to keep highs intact over long runs, making it a great pick for studio and live use.
Third, use balanced cables for long runs. Balanced cables have three conductors: two signal wires and one ground. This design cancels out electrical interference, and it also allows for lower signal loss and capacitance over longer distances than unbalanced cables. Unbalanced instrument cables, for example, are fine for short runs (under 10 feet), but for runs over 15 feet, switching to a balanced XLR or TRS cable with low capacitance will make a huge difference in clarity.
Fourth, match your cable to your gear. If you have a high-impedance microphone or a high-output guitar, you can get away with slightly higher capacitance, because their output is strong enough to overcome small amounts of rolloff. If you have a low-output ribbon mic or a passive bass, you’ll want the lowest capacitance cable you can find, because their weak signal is much more sensitive to signal degradation from capacitance. That’s why our USB C Microphone Adapter is built with low-capacitance wiring to preserve the delicate signal from USB mics and adapters, which are especially sensitive to cable-related losses.
I’ll wrap this up with a recent example that stuck with me. A local indie band came to me last month, frustrated that their live set had been sounding “muddy” at recent shows. They were using a cheap 25-foot bulk mic cable for their lead vocals, a 20-foot instrument cable for their rhythm guitar, and a 30-foot power cable for their amp rack. After testing their setup, I found the mic cable had a capacitance of 55 pF/ft, the guitar cable was 52 pF/ft—way too high for long runs with high-impedance gear. I swapped them for low-capacitance 10-foot XLR and instrument cables, and their power cable for a durable, low-capacitance alternative, and they brought the same setup to a gig a week later. The band’s sound engineer said the difference was night and day: vocals were clearer, guitar had more crisp harmonics, and the mix didn’t sound muddy anymore. They saved money by not buying new gear, just by upgrading their cables to handle the signal better.
At the end of the day, cable capacitance is a reminder that great audio isn’t just about expensive mics and top-of-the-line interfaces—it’s about the small, hidden parts of your setup that carry the signal from point A to point B. As an audio cables supplier, my job isn’t just to sell you a cable—it’s to help you pick the right one for your needs, whether you’re a podcaster doing a 10-foot run from your mic to your computer, or a live engineer running 50-foot mic cables across a festival stage.


If you’re dealing with muffled highs, muddy mixes, or signal dropouts that you can’t track down, don’t hesitate to reach out. We can help you find the right low-capacitance cables, adapters, and power solutions for your specific setup, whether that’s a short USB C Microphone Adapter for your home studio or a long PowerCON True1 Splitter Cable for your next big tour. Contact us today to learn more and find the perfect cables to elevate your audio quality.
References:
- Eargle, J. (2005). Microphones: Design and Application. Focal Press.
- Pass, R. (2012). Audio Cable Design and Application. Audio Engineering Society.
- White, G. (2018). The Sound Reinforcement Handbook. Hal Leonard.
- Davis, D., & Jones, R. (2020). Introduction to Audio System Design. Routledge.
- Self, D. (2015). Audio Power Amplifier Design. Focal Press.