Installing audio cables in a wall is one of those projects that makes beginners pause (trust me, I’ve fielded this question from my fair share of DIYers and home studio owners since I started working with Audio Cables). It’s not as complicated as it sounds, but it requires patience, the right tools, and a bit of knowledge to avoid botching walls, damaging audio signal, or dealing with frustrating signal loss later. When I first started helping customers with this, I learned the hard way that rushing the prep work leads to costly re-runs, so I’m breaking this down step by step—from planning to finishing, plus how to pick the right cables for your space.
First, let’s start with the basics: why install audio cables in a wall, anyway? Most people do this to clean up a messy home theater, build a dedicated recording studio, or set up a conference room that works reliably every single time. Running cables through walls eliminates tripping hazards, hides unsightly wires, and gives your space a professional, polished look that’s way better than a snake of cables trailing across the floor. But before you grab a drill, you need to map out exactly what you’re wiring and where it’s going.
Step 1: Plan Your Layout and Cables (The Most Important Part)
This is where most people skip ahead and end up in trouble. You wouldn’t buy a random length of extension cord and drill a hole, right? Same logic applies here. First, figure out the audio devices you’re connecting. Are you wiring for a home stereo, a live performance space, a small meeting room, or a full studio? That will dictate which cables you need.
For example, if you’re setting up a conference room with multiple mics or a central audio system, our Hand in Hand Conference 8-core Aviation T-type Extension Cable is perfect here. It’s designed to handle multiple audio signals at once without interference, which is critical for conference calls where clear, crisp audio is non-negotiable. The aviation-grade connector is sturdy enough for regular plugging and unplugging, so it works well for rooms that get daily use. If your setup has older MIDI gear—say, a synthesizer or a control surface—our Right-Angle 5-Pin DIN To Same MIDI Cable is ideal. The right-angle design lets you snake it through tight wall cavities without kinking or putting stress on the connector, which is a common issue with straight MIDI cables.
If you’re working with balanced audio signals for studio monitors or external speakers, the RJ45 Female to Dual 1/4" TRS Audio Cable is a game-changer. RJ45 cables are easy to run through walls (they follow standard Ethernet paths, so you can use existing stud cavities if you want) and the dual TRS ends give you two separate audio connections in one cable, cutting down on the number of runs you need. Pro tip: Always measure the exact distance between your audio source (like a receiver or mixer) and the wall plate location—add 2-3 feet to that for mistakes, wall cavities, and connections. Never run a cable shorter than you need; excess cable can be coiled neatly in a wall box later, but too short means you have to re-drill.

Step 2: Check Local Building Codes and Pre-Drill Checks
Before you lift a power drill, call your local building department or check their website—many areas require permits for running cables through walls, especially if you’re drilling through load-bearing studs. Even if it’s not required, take 10 minutes to map out your wall’s structure. Stud finders are cheap, and they’ll show you where the wooden studs are, as well as any electrical wires or HVAC pipes running through the wall—drilling into an electrical wire is a hazard, and hitting a pipe will lead to an expensive mess.
I always tell customers to mark their drill spots with a pencil before drilling. If you’re running cable horizontally between two walls (say, from a basement to a living room), mark the line first to make sure you’re not drilling at an angle. For single-story homes, running cable through the attic or basement to the wall cavity is often easier than drilling from the room above or below. For multi-story homes, always drill vertically through studs, never horizontally—horizontal drilling weakens the stud, and building codes usually ban it.
Step 3: Gather Your Tools and Prep the Cable
Now that you have your layout and cables picked out, it’s time to get your tools. You’ll need a stud finder, a drywall saw (not a drill bit that’s too big—drywall saws give you clean, precise holes), a fish tape (this is a thin, flexible metal or plastic tool that lets you push cable through wall cavities), a drill, cable staples (but only for non-load-bearing walls—never use staples on electrical cables, same rule applies here), and a wall plate (this is where your audio connectors will sit, to keep things neat and accessible).
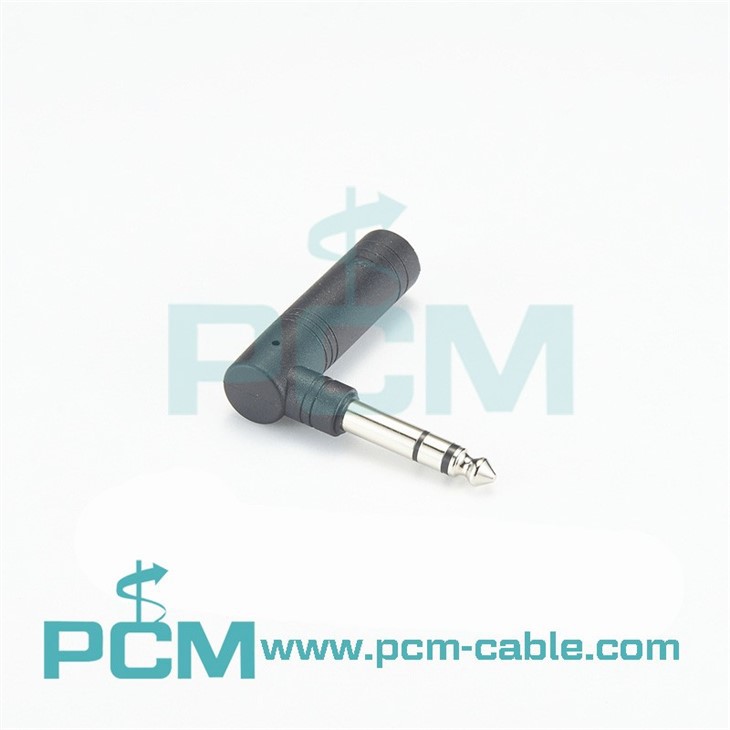
If you’re using cables that require connectors—like the RJ45 cable or the TRS adapters—take time to terminate them correctly before you run them through the wall. Trying to crimp or solder a connector once the cable is stuck in a wall cavity is a nightmare, trust me. For example, our 1/4 Inch TRS Adapter Male to Female Audio Connector works perfectly with the RJ45 cable, so terminating the ends before running the cable will make it much easier to attach to your wall plate later. If you need to adapt to smaller connections, our 1 4 To 3.5mm Headphone Adapter is a handy add-on for devices that use mini-jacks, though most wall installations use standard 1/4" or XLR connections for better signal quality.
Prepping the cable also means checking for damage. Run your fingers along the entire length of the cable to make sure there are no frayed wires or kinks—damaged cable will cause signal loss or static, and it’s way harder to replace if it’s already in the wall. Pull the cable gently at both ends to straighten it out before feeding it through the wall.
Step 4: Run the Cable Through the Wall Cavity
This is where the fish tape comes in. Start by drilling a small pilot hole from the access point (like the basement or attic) into the wall cavity, right at the stud you marked earlier. Make the pilot hole big enough to fit the fish tape—usually 1/2 inch works. Insert the fish tape through the pilot hole, and feed it slowly until you can see it come out of the hole you drilled at the wall plate location (this might be in a closet, behind a TV, or near your conference table). If you can’t get the fish tape to line up, don’t force it—adjust your drill spots slightly, because forcing the fish tape can get it stuck in the insulation or behind studs.
Once the fish tape is through, attach the audio cable to the end of the fish tape with electrical tape (wrap it tightly so it doesn’t come loose mid-pull). Make sure to leave a 3-4 foot tail on both ends—one at the access point, one at the wall plate—so you have extra to work with. Then, gently pull the fish tape back through the wall cavity, feeding the cable as you go. Go slow here—pulling too hard can damage the cable or yank the tape loose, leaving you with a stuck cable. If the cable gets caught, stop pulling and gently wiggle the fish tape to free it, or use a small hook to pull insulation or debris out of the way.
For horizontal runs between two studs, repeat the process: drill a pilot hole in the first wall cavity, feed the fish tape through, drill the second pilot hole on the other side, and pull the cable through. Always keep cable at least 1 inch away from electrical wires—this reduces interference, which is a big deal for clear audio. I’ve had customers complain about static in their studio only to realize their audio cable was run right next to a power cable for a TV, so this small step saves you a lot of headaches.
Step 5: Finish the Wall and Test the Connection
Once the cable is run, it’s time to mount the wall plate. Most wall plates have screw holes that line up with standard electrical boxes, so you can mount it directly in the wall (or in a low-voltage electrical box, which is recommended for audio cables to keep them organized). Trim the excess cable, leaving that 3-4 foot tail we talked about, then attach your connectors using the adapters you picked earlier. For example, if you used the RJ45 cable for your studio monitors, you’ll connect the 1/4 Inch TRS Adapter Male to Female Audio Connector to the ends of the RJ45 cable, then plug that into the wall plate.
If you need to adjust any connections, use our handy adapters like the 1 4 To 3.5mm Headphone Adapter if you’re connecting to a device with a mini-jack. Once the wall plate is secured, patch up the holes you drilled for the pilot holes—use drywall compound, sand it smooth, and paint it to match the wall, and no one will ever know there’s a cable behind there.
The last, most important step: test the audio connection before you finish the entire project. Plug your source (a phone, mixer, or mic) into one end of the cable, and your speaker or device into the other. Play a test tone or a song, check for static, crackling, or lost signal. If something’s wrong, don’t panic—you can fish the cable back out (most of the time, as long as you left a tail at the access point) and re-check the connections. Common issues here are loose adapters, frayed wires, or cable run too close to power, so double-check those first.
Now, a quick note on choosing the right cable for your specific project. If you’re setting up a small conference room, the Hand in Hand Conference 8-core Aviation T-type Extension Cable is tailored for multi-device conference audio, so it’s less likely to have cross-talk than a generic cable. For MIDI gear, the Right-Angle 5-Pin DIN To Same MIDI Cable fits perfectly in tight spaces and doesn’t wear out as fast as straight cables, which is great for studios with a lot of moving parts. The RJ45 Female to Dual 1/4" TRS Audio Cable is versatile enough for home theaters, small studios, and even outdoor setups if you use in-wall rated cable (always make sure your cable is CL2 or CL3 rated for in-wall use, which you’ll find on our product pages).
If you’re just getting started with wall audio installations, don’t be afraid to ask for help. Even if you’re a DIYer, picking the right cable is half the battle, and we’ve helped hundreds of customers pick the perfect fit for their project. Whether you need a single adapter, a long conference cable, or a full set of wall-run audio lines, we have the products to fit your needs. To discuss your specific project, get custom length recommendations, or ask any questions about installation, feel free to reach out. We’re here to help you get clean, reliable audio runs without the hassle.
References:
- National Electric Code (NEC) Article 725: Low-Voltage Communication and Control Circuits
- Audio Engineering Society (AES) Guidelines for In-Wall Audio Cabling Installation
- Drywall Installation Best Practices for Residential and Commercial Spaces
- Audio Cables, LLC Product Specifications and Installation Guides (2024)