If you’re anything like me—someone who’s built a whole career around audio cables (I run a small, go-to brand for all things audio connectivity, and I get at least 10 DMs a week from newbies panicking about setting up their gear)—you’ve stared at a pile of chunky portable audio gear and tiny, weirdly shaped connectors and thought, “Wait, how do these even click together without frying my speaker or wasting a whole set of batteries?”
Turns out, connecting audio cables to portable devices isn’t rocket science, but there are a few little tricks I’ve learned over the years (and a few mistakes I’ve made early on) that make the whole process way less stressful. I’m going to walk you through it step by step, no fancy jargon, and throw in some of our most popular cables that work perfectly for portable setups along the way. Let’s dive in.
First, let’s get one thing straight: portable audio devices come in all shapes and sizes these days. You’ve got your mixers, field recorders, portable PA systems, guitar pedals, and even those tiny Bluetooth transmitters people use for busking. The number one mistake I see people make is grabbing the wrong cable for the port, not just the device. For example, if you’re running a portable field recorder to a set of monitor speakers, you don’t want a generic cable that’s too short or has the wrong end on it.
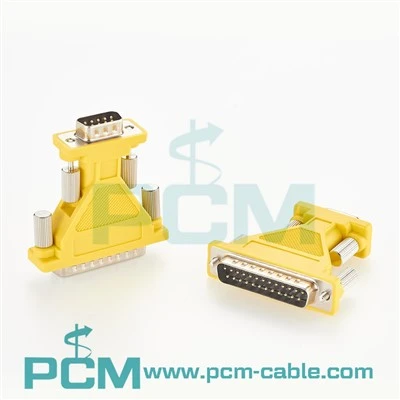
Let’s start with the basics: identifying your ports. Before you plug anything in, pause for 10 seconds to look at the back or side of your portable device. The most common ports you’ll run into are 1/4” TRS (that’s the chunky, round ones, often found on mixers and instruments), XLR (the three-pin ones, usually for mics and balanced audio), RJ45 (the square, 8-pin connectors, super common in professional AXIA gear and multi-channel setups), and DB25 (the big, 25-pin D-shaped port, mostly for digital multi-channel connections). If you’re lucky, your device will have labels next to each port—look for things like “Line Out,” “Mic In,” or “Digital Audio” to avoid plugging a mic into a headphone jack (trust me, I’ve seen that happen, and it sounds terrible).
Once you know what ports you’re working with, the next step is matching the right cable. This is where I can chime in with our cables, because we’ve built a whole line with portable setups in mind—we use flexible, lightweight jackets instead of thick, bulky ones, so they don’t snag when you’re moving gear between gigs or a studio session. Let’s say you’ve got a portable mixer with two 1/4” TRS outputs, and you need to connect them to a system that uses an RJ45 input. That’s exactly the kind of use case for the RJ45 Female to Dual 1/4” TRS Audio Cable. It’s designed to convert two separate 1/4” balanced signals into a single RJ45 digital connection, which is perfect for keeping your setup neat when you’re working in tight spaces (like a small café gig or a field recording spot where every inch of space counts). No more tangling three separate cables when one does the job—game changer.
Wait, but what if you’re dealing with more channels? Like, if you have an 8-input portable snake mixer and you need to connect it to a recorder or a portable PA? Our DB25 To 8 XLR Female Audio Snake Cable is made for that. The DB25 end is the standard for multi-channel digital audio on portable gear, and the eight XLR females let you plug in mics, instruments, or line-level sources without needing a bunch of adapters. I’ve had a few traveling sound engineers tell me this cable is a lifesaver for outdoor festivals, because it’s durable enough to withstand being stuffed in a gear bag, and the color-coded XLR pins make it easy to trace each channel even when your hands are cold. Of course, if you want something a little shorter for smaller gigs, our 4-Channel Audio Snake RJ45 Female to XLR 2Males to 2Females is 2 meters long—perfect for connecting a portable recorder to a pair of speakers on a desk or a small stage. No tripping over long cables mid-set, which is a huge win.
Okay, now let’s get to the actual connecting part. This is the part where most people rush and end up with a crackling sound or no audio at all. First, rule number one for portable gear: turn everything off before you plug in or unplug cables. I know, I know—you’re in a hurry to test your new rig, but plugging a cable into a powered device can cause a power surge that fries the input or even your cable. I learned this the hard way when I plugged an unbalanced cable into my portable recorder while it was on, and I had to send it in for repairs. Don’t be me.


So step one: power down both your portable audio device (mixer, recorder, etc.) and whatever you’re connecting it to (speakers, monitors, another gear). That way, you avoid any accidental surge or audio glitches. Next, take your chosen cable and inspect the connectors before you plug them in. Look for bent pins (super common with portable gear—stuff gets tossed around!), dirty contacts, or any fraying on the cable jacket. If you see a bent pin, gently straighten it with a small, flathead screwdriver (be careful not to break it off!). If there’s fraying, don’t use it—portable cables take a beating, and a frayed one can cause intermittent audio that’s impossible to troubleshoot mid-gig.
Once your cables are good to go, line up the connectors. Each type of connector has a specific way it plugs in: 1/4” TRS is smooth, you just push it in until it clicks (some have a little ring you twist to lock it, so don’t force that—twist gently until it tightens). XLR has a little notch on the male connector that lines up with a hole on the female one—push straight in, then twist the locking ring clockwise until it clicks into place. RJ45 is like a big Ethernet cable—push it straight into the port until you hear a little click, which means the locking tab is engaged. DB25 is the D-shaped one, so line up the edges, push straight in, then tighten the two small screws on either side to keep it from coming loose (critical for portable gear, because if that cable falls out mid-recording, you’re screwed).
Wait, let’s circle back to digital connections, because that’s where a lot of portable users get confused. A lot of modern portable audio gear uses digital connections instead of analog, because they deliver cleaner, interference-free audio over longer (well, portable-length) distances. For example, if you’re connecting a TASCAM portable digital recorder, our DB25 To RJ45 TASCAM DIGITAL Adapter Cable is exactly what you need. It converts the DB25 multi-channel output from your TASCAM to an RJ45 digital input, so you can connect it to a digital snake or a portable monitor system without losing quality. No more analog noise creeping in, especially if you’re working near power lines or other electronics that cause interference. That’s a big deal for field recording, where background noise can ruin a whole session.
Now, after you’ve plugged everything in, the next step is balancing the connections (if they’re balanced—most professional audio connections are balanced, which is why our cables use balanced wiring for portable use). Balanced audio uses two signal wires and a ground, so it cancels out noise. Unbalanced is just a signal and a ground, which works for short runs but picks up interference over time. All the cables I mentioned earlier—RJ45 Female to Dual 1/4” TRS, DB25 To 8 XLR Female Audio Snake, all of them—are balanced, so you’re good to go as long as you’re plugging them into balanced ports. Pro tip: if your portable device has both balanced and unbalanced ports, always use the balanced one for better sound, especially in noisy environments.
Once everything is plugged in, double-check all connections to make sure none are loose. Then, turn on your portable audio device first, wait 10 seconds for it to boot up, then turn on the speakers or monitors. Test each channel one by one: play a track or a test tone, and listen for any crackling, static, or missing channels. If you have a channel that’s not working, first check the cable connection—make sure it’s pushed in all the way, and the locking tab or ring is engaged. If that’s not it, try swapping the cable with another one (if you have a spare) to see if the cable is faulty. For portable use, it’s always good to have a spare cable in your gear bag—you never know when one will break mid-job.
Wait, what about if you need to make a custom connection? Sometimes, portable setups require a cable that’s not off-the-shelf, right? Like, if you need an RJ45 to open ends to solder your own connectors on the fly. Our RJ45 Female to Dual Open End AXIA Cable is perfect for that—we stripped back the jacket to expose the two wires so you can solder them to whatever connector you need, whether it’s a 1/4”, XLR, or something else. It’s lightweight and flexible, so it’s easy to work with, and the AXIA wiring is reliable, so you won’t get a flimsy connection that breaks.
Now, let’s talk about common mistakes to avoid with portable audio cables. First, don’t yank cables out of ports by the cable itself—grab the connector body, not the wire, because that can fray the cable over time, which is a huge pain when you’re setting up on the go. Second, don’t use too long a cable for portable setups—longer cables pick up more interference, and they’re more likely to get tangled or stepped on. We make all our portable cables in lengths that are just right: 2 meters, 5 meters, nothing longer than 10 meters, so you get clean audio without the hassle. Third, label your cables! When you’re packing up gear after a gig or a session, label each cable with a piece of tape or a marker so you don’t mix up inputs and outputs. I once spent 20 minutes untangling 10 unlabeled cables at a small show, and it took away from the time I should have spent setting up the sound. Don’t make that mistake.
If you’re new to portable audio setups, start small. Test your connections at home first before you take them out to a gig or a field recording. Use a test track or a tone generator on your phone to make sure each channel is working, and listen for any background noise. If you’re unsure about a cable, reach out—we’ve got a team of audio people who can help you pick the right cable for your specific portable device, whether it’s a mixer, recorder, or PA.
At the end of the day, connecting audio cables to portable gear is all about being prepared, taking your time, and using the right tools (aka the right cables). I’ve seen people save hundreds of dollars in gear repairs and avoid stressful setup disasters just by following these simple steps. Whether you’re a busker setting up a portable PA on a street corner, a field recordist capturing sound in the woods, or a hobbyist testing new gear in your home studio, the right cable makes all the difference.
If you’re looking for reliable, portable audio cables that are built to withstand the wear and tear of on-the-go use, we’ve got you covered. From multi-channel snakes to adapter cables for digital recorders, every cable we make is designed with portable users in mind. If you’re ready to stock up or need help finding the right cable for your setup, reach out to our team to chat through your project. We’re here to help make your audio connections work, so you can focus on the music or the recording, not the tech headaches.
References
- Audio Cable Industry Standards: Balanced vs. Unbalanced Signal Transfer (2023)
- Portable Audio Gear Setup Best Practices for Field Recordists and Live Performers (2024)
- Common Connector Issues in Mobile Audio Setups: Troubleshooting Guide (2023)
- AXIA Digital Audio Cable Specifications for Multi-Channel Portable Applications (2024)