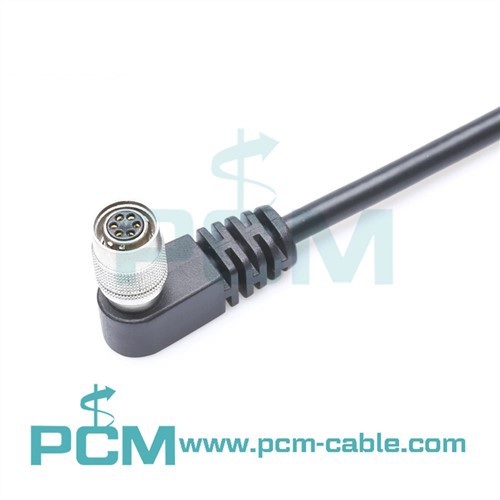
Faulty FTTA (Fiber to the Antenna) cables can disrupt your communication network, causing signal loss, slow data transmission, and even complete network outages. As a trusted FTTA Cables supplier, we understand the critical role these cables play in maintaining a seamless and efficient network. In this blog post, we'll guide you through a systematic approach to troubleshooting problems with FTTA cables, helping you identify and resolve issues quickly and effectively.
Understanding FTTA Cables
Before diving into troubleshooting, it's essential to understand the basics of FTTA cables. These are specialized fiber optic cables used to connect the base station equipment to the antennas on the cell towers. They are designed to withstand harsh outdoor conditions, including extreme temperatures, moisture, and UV radiation. FTTA cables are available in various types and configurations, each tailored to specific network requirements and environmental conditions. Some of the common types of FTTA cables we supply include NSN Outdoor Fiber Optic Cable Assembly, ODLC Outdoor Fiber Optic Cable, Fibre Patch Cable LC Uniboot, FULLAXS Outdoor Fiber Optic Patch Cord, and ODVA MPO Fiber Patch Cable.
Step 1: Initial Assessment
The first step in troubleshooting FTTA cables is to conduct an initial assessment of the problem. This involves gathering as much information as possible about the symptoms, the location of the issue, and any recent changes or events that may have contributed to the problem. Here are some questions to ask during the initial assessment:
- What are the symptoms? Is there a complete loss of signal, slow data transmission, or intermittent connectivity?
- Where is the problem located? Is it at a specific antenna, base station, or along a particular cable route?
- When did the problem start? Did it coincide with a recent weather event, equipment upgrade, or maintenance activity?
- Have there been any recent changes to the network? This could include the installation of new equipment, changes to the configuration settings, or the addition of new cables.
Step 2: Visual Inspection
Once you have a clear understanding of the problem, the next step is to conduct a visual inspection of the FTTA cables. This involves checking for any obvious signs of damage, such as cuts, kinks, or bends in the cable, loose or damaged connectors, or signs of moisture or corrosion. Here's how to perform a visual inspection:


- Inspect the cable jacket: Look for any visible damage to the cable jacket, such as cuts, abrasions, or punctures. These can expose the fiber optic strands inside the cable, leading to signal loss or degradation.
- Check the connectors: Examine the connectors at both ends of the cable for any signs of damage, such as bent pins, loose connections, or dirt and debris. Clean the connectors using a lint-free cloth and a suitable cleaning solution if necessary.
- Look for signs of moisture or corrosion: Check for any signs of moisture or corrosion on the cable jacket, connectors, or splice points. Moisture can cause the fiber optic strands to degrade over time, while corrosion can damage the connectors and affect the signal quality.
- Inspect the cable routing: Ensure that the cable is properly routed and supported, without any sharp bends or kinks. Excessive bending or kinking of the cable can cause signal loss or degradation, especially in high-speed applications.
Step 3: Testing the Cable
If the visual inspection does not reveal any obvious signs of damage, the next step is to test the cable using specialized equipment. This involves measuring the optical loss, reflectance, and other parameters of the cable to determine if it is functioning properly. Here are some common tests used to troubleshoot FTTA cables:
- Optical Loss Test: This test measures the amount of light loss that occurs as the signal travels through the cable. A high optical loss can indicate a problem with the cable, such as a break, a bend, or a dirty connector.
- Reflectance Test: This test measures the amount of light that is reflected back from the end of the cable. A high reflectance can indicate a problem with the connector, such as a poor termination or a damaged ferrule.
- OTDR (Optical Time Domain Reflectometer) Test: This test uses a pulse of light to measure the length and location of any breaks or faults in the cable. The OTDR can also provide information about the optical loss and reflectance at different points along the cable.
Step 4: Identifying and Resolving the Problem
Based on the results of the visual inspection and the cable testing, you should be able to identify the root cause of the problem. Here are some common problems with FTTA cables and their solutions:
- Cable Damage: If the cable is damaged, it will need to be replaced. Make sure to use a high-quality cable that is suitable for your specific application and environment.
- Connector Problems: If the connectors are loose, dirty, or damaged, they will need to be cleaned, tightened, or replaced. Use a proper cleaning tool and a suitable cleaning solution to clean the connectors.
- Moisture or Corrosion: If there is moisture or corrosion on the cable or connectors, they will need to be dried and cleaned. In some cases, it may be necessary to replace the affected components.
- Cable Routing Issues: If the cable is not properly routed or supported, it may need to be re-routed or secured. Make sure to follow the manufacturer's guidelines for cable routing and support to avoid any future problems.
Step 5: Preventive Maintenance
Once you have resolved the problem, it's important to implement a preventive maintenance program to avoid future issues with your FTTA cables. Here are some preventive maintenance tips:
- Regular Inspections: Conduct regular visual inspections of your FTTA cables to check for any signs of damage or wear. This will help you identify and address any potential problems before they become major issues.
- Cleaning and Testing: Clean and test your FTTA cables on a regular basis to ensure that they are functioning properly. This will help you detect any changes in the cable performance and take corrective action if necessary.
- Proper Installation: Make sure that your FTTA cables are installed correctly, following the manufacturer's guidelines and best practices. This will help you avoid any installation-related issues, such as cable bending, kinking, or improper termination.
- Environmental Protection: Protect your FTTA cables from harsh environmental conditions, such as extreme temperatures, moisture, and UV radiation. Use suitable cable jackets, connectors, and enclosures to ensure the long-term reliability of your cables.
Conclusion
Troubleshooting problems with FTTA cables can be a challenging task, but by following a systematic approach and using the right tools and techniques, you can quickly identify and resolve the issues. As a leading FTTA Cables supplier, we are committed to providing our customers with high-quality products and expert support to help them maintain a reliable and efficient network. If you have any questions or need assistance with troubleshooting your FTTA cables, please don't hesitate to contact us. We'll be happy to help you find the best solution for your needs.
References
- Fiber Optic Association. (n.d.). Fiber Optic Cable Installation Best Practices. Retrieved from [Website URL]
- Corning Optical Communications. (2019). FTTA Solutions: Design, Installation, and Maintenance. Retrieved from [Website URL]
- IEEE Standards Association. (2018). IEEE Standard for Ethernet. Retrieved from [Website URL]